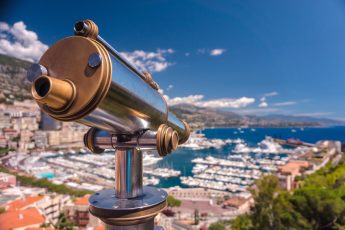
Scopes are great for taking pictures of things you wouldn’t usually see. With them, you can take pictures of planets and stars that would otherwise be too far away to capture with regular cameras. But how do you take pictures through a telescope? It’s not hard at all!
Telescope Accessories
- A tripod. This is the most basic accessory you can use to take high-quality pictures through a telescope. You’ll need it to keep your phone steady and prevent blurriness.
- A phone mount. If you’re using a regular camera, this might be called a camera tripod adapter, but with phones its just called “a phone mount.” These come in all shapes and sizes—from traditional mounts that clap onto the end of your telescope tube, to newer smartphone adapters that attach directly to the eyepiece end of your scope (which work great for widefield astrophotography).
- A telescope adapter. To use any sort of lens or filter system with your phone mounted on top of a telescope, you’ll need an adapter tube that screws into the eyepiece end of your scope like a cap fits over its bottle top—this lets you screw in any kind of attachments while keeping them firmly attached but easily removable when needed. Some scopes come with these built-in built-in; others require additional purchase separately at specialty stores or online marketplaces such as the Amazon Prime Day deals page (or whatever day happens after June 14th).
Phone Accessories

- Phone mount: Unless your telescope comes with a tripod, you’ll need to buy a phone mount that fits onto the eyepiece. There are many options to choose from, but check for compatibility with your phone’s dimensions and features before purchasing one.
- Battery pack: If you plan on using the telescope for long periods of time (more than an hour), it’s always best to have a backup battery pack near by so that your phone won’t die in the middle of taking pictures.
- Tripod: While not necessary unless you’re using an SLR camera or other professional equipment, tripods help keep things steady during long exposures and capturing photographs in low light conditions. A good tripod will cost around $50—and they make great gifts! Check out our list of recommended ones here.
- Lens adapter: Some telescopes come with adapters that allow them to accept different lenses or filters on top of what came standard when purchased new—this allows users who want better quality images from their devices while still retaining full access to camera functions such as zoom levels etc., all while keeping costs down vs buying another piece just for photography purposes alone! They’re also easy enough
Setup
First, you’ll need to mount your phone on a tripod. This is the best way to keep it steady while you’re taking pictures through the telescope. If your phone has a tripod mount on top of it, this should be easy—just make sure that the tripod head is locked tight, so that when you take pictures later on in this process, they’ll be as crisp and clear as possible.
If your phone doesn’t have a tripod mount built into it, there are other options for mounting it onto a stand or table:
- You can use an adapter for your smartphone that allows for mounting in place of binoculars or telescopes (this may be easier than trying to fit round lenses into square holes). These adapters usually come with two parts: one part slides onto an eyepiece from above; another part sits below the eyepiece and secures itself with screws through holes in its base plate. Some adapters also include adjustable knobs for fine-tuning how tightly everything fits together so that there isn’t any unwanted slippage between pieces of metal or plastic during use. If your adapter doesn’t include these components by default then consider buying them separately because they’ll help ensure stability while using all kinds of devices together at once!
- Another option is purchasing actual binoculars made specifically for digital cameras instead; these typically have built-in tripods but sometimes require extra equipment like remote controls in order for taking pictures without having someone hold down both buttons simultaneously themselves manually).
Focus and Shoot
Next, you’ll want to focus on your object.
If you’re using a telescope, this will be easy because the focusing knob is right there in front of you and it’s pretty obvious that when it’s all the way out at infinity, everything should be sharp. If not, check what kind of focus your camera has by looking at how close/far away things are in focus when looking through the viewfinder (or live view).
If they’re blurry or look like they’re smudged then your camera isn’t focused properly and needs adjusting. The easiest way to do this is with auto-focus but if that doesn’t work or if you want more control over exactly what’s being focused on (like making sure everything stays sharp even if there’s movement), then go ahead and adjust manually until everything looks good!
Post-Processing and Sharing
Now that you’ve taken your photos, the real fun begins. In order to post-process them, import them into your computer. From there, use photo editing software (Adobe Photoshop is one of many options) to adjust the contrast, brightness and color of your image.
Once you’ve adjusted your images and are happy with their appearance, upload them to social media!
Your phone can help you take amazing pictures through a telescope
Your phone can help you take amazing pictures through a telescope.
Mobile phones have become increasingly powerful, and many of us carry them with us wherever we go. It’s easy to imagine that, in time, it will be possible for people to take high-quality photographs through their cell phones alone—but this isn’t necessarily the case. The fact is that there are some important limitations on what can be done with a cell phone camera. For example:
- Cell phones have small sensors—as small as 1/4″ (6mm). This means that they capture much less light than large-format cameras or dedicated astronomical telescopes (which can be several inches in diameter). While this doesn’t mean that you won’t see anything at all when using your camera phone out under the stars, it does mean that any faint details in your image will likely be washed out by noise generated by too little light hitting those tiny sensors.
- Cell phone lenses don’t capture a vast field of view when compared with large-format lenses used on DSLR cameras or scopes like those made by Celestron and Meade–and even then there may still be some vignetting (darkening) around the edges due to geometry issues between lens sizes versus sensor size vs “field stop diameter.”
Conclusion
The best thing about using your phone as a camera is that it’s always with you. And if it’s a smartphone, chances are it has a built-in camera app. Here are some tips on taking photos through a telescope with just your phone:

